hi there folks!!!!! I thought i would share with you how to make the most simple but effective backdrop to use when photographing cards. all it takes is 4 sheets of white A4 card and some tape. best of all its completely reusable and folds away for simple storage.
1) ok first of all take 4 sheets of A4 card... i use white as it clean and neat in your photographs but theres nothing stopping you using any other colour to match your blog background - just keep it plain and simple. for the tutorial ive used a pink cellotape just so it shows up and you can see it.
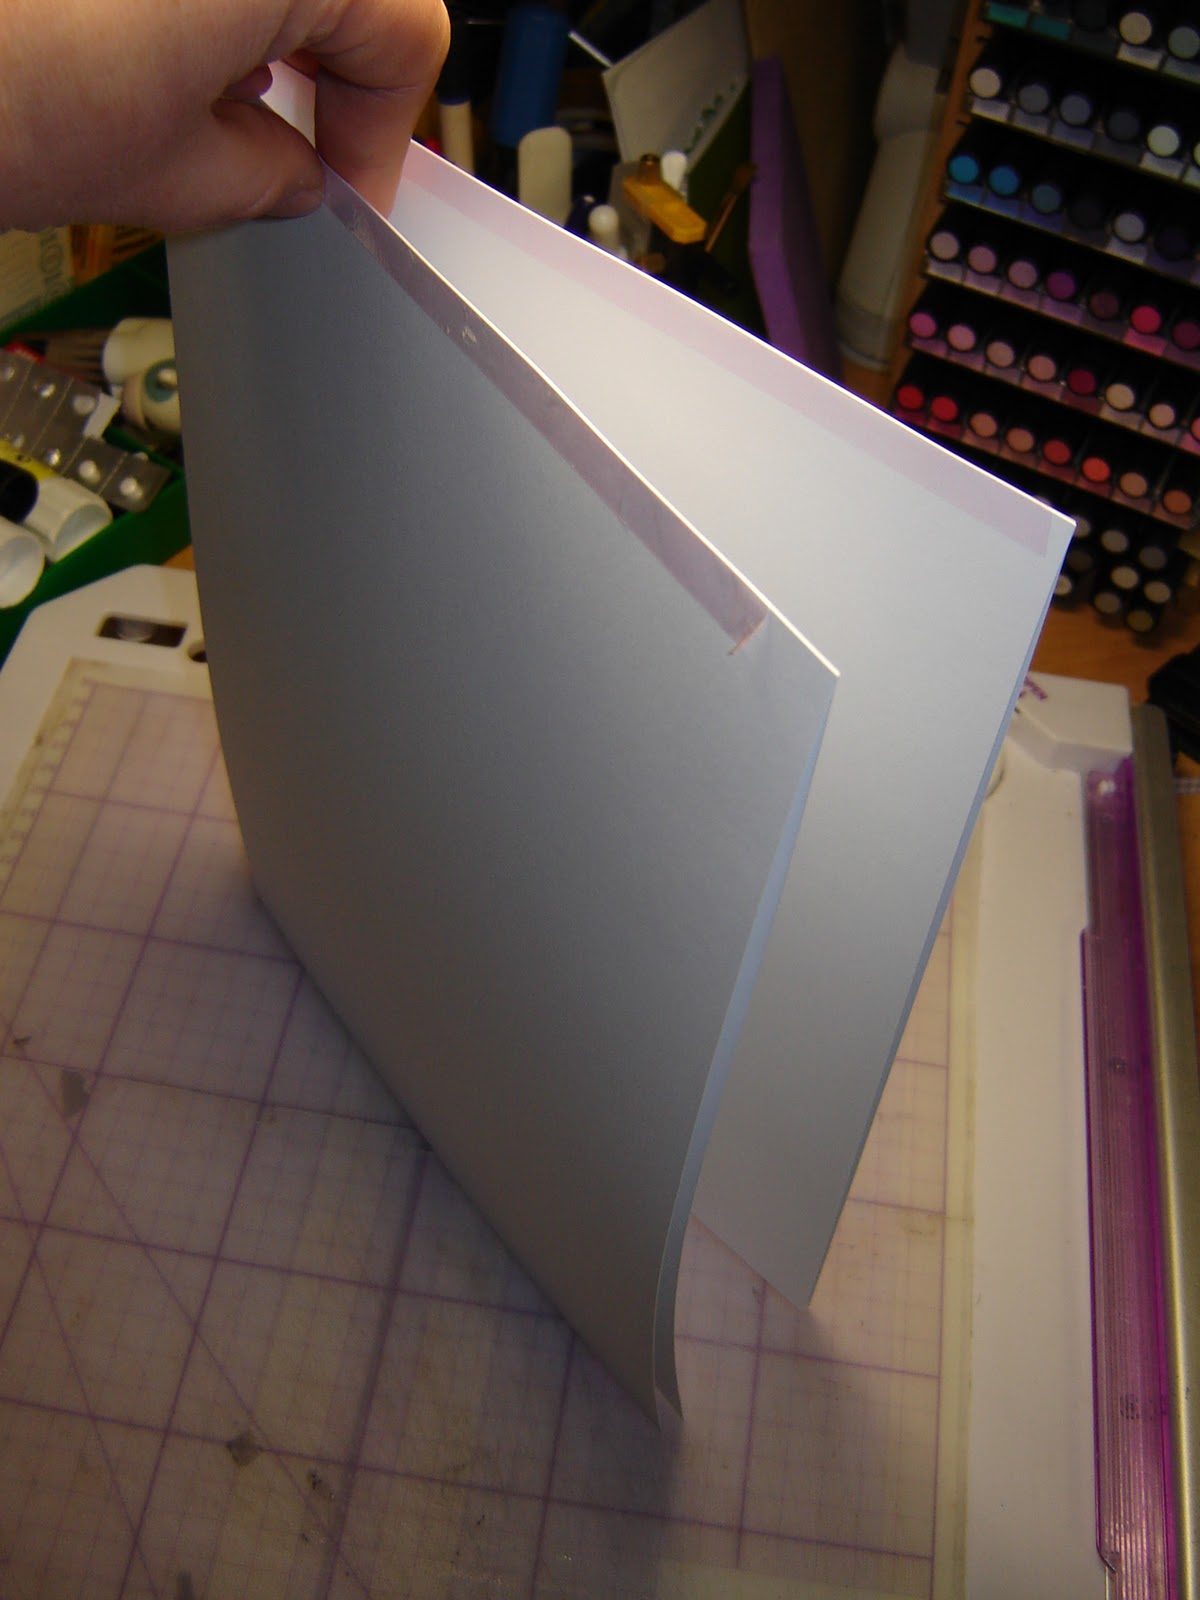
2) take 2 of the sheets and tape them from top to bottom down the longest length.
3) now take a 3rd sheet and tape it to the top of one of your existing sheets along the join - make sure they are neatly butted together.
4) now do the exactly the same with the final piece adding it to the other side. make sure your tape does not overlap onto the third piece of card as there needs to be a free moving part here.
5) now give all the seams a good fold and a crease along where you have taped
6) your backdrop is now finished!! just turn it so the none taped side is facing you and the untaped pieces are at the bottom. overlap these 2 pieces as so and your backdrop will stand up on its own
7) i use a little wooden easel to stand my cards on but you can just freestand cards on it if you wish. place your card stand or easel right back into the fold..
8) now of course add your project.
9) now its time to take your picture. zoom in close so the outside edges of your picture are encased in the backdrop. perfect every time - no messy backgrounds, having to declutter desks or run around trying to find the perfect background. the focus of your picture is now on your beautiful artwork - not on your housework heheh
10) all finished - now all you have to do is fold it up and pop it away till next time !! takes no more room than a sheet of paper - easy!!!!!!!!!!!
if you have enjoyed this tutorial let me know what you think by kindly leaving me a comment xxxxxx
hugs - Redrottie


41 comments:
simple yet so effective! Thanks for this Rottie. xx
Brilliant idea Karen and thanks for the tutorial...hugs Kath
aka neomer on DC
What a brilliant idea, i need this so all my kitchen bits dont show. Thanks bud xx
fab idea! thank you x
fab tutorial karen,your blog is looking fab,x
FAB!!! I know what to do now rather than trying to balance my x2 pieces of card against something!
Thanks - GREAT blog too - Love it!
Carol x
Wow and so simple, thanks for sharing, Karenx
What great idea. Thanks for sharing it with us. Karen I really like your blog, well done!
What a brilliantly simple and effective idea, thanks for sharing.
Suze
brilliant, thanx so much for sharing x
great blog
what a clever idea & sooo simple!! thank you for this love Gill x x x
Fabulous idea I usually use my wall as a backdrop but it does not always go with the card so I shall def being using this Thank you Rottie :O) Chris xx
(leapblogger DC)
Brilliant Karen, well done
This is fabby, i shall have to make me one.
thanks
Kate xxx
Such a clever idea, I have a mini easel but never use it as there is never any clear space behind it lol! TFS. hyper_ni (DC) x
Thanks, great tutorial. I will give this a try.
Oh I missed this. Brilliant idea. Must have a try. Thanks for sharing. Kathleen (goldengirl)
Very clever Karen, I love that idea, well done you, your blog is coming on in leaps and bounds. Hugs Teresa xx
What a brilliant idea, Karen, thank you for sharing. I will definitely be giving it a go xx
Hi Karen, finally got round to making this and its fabulous.
Thanks
Lizzie
Great idea Karen, so simple. Thank you for your tutorial :o)
Jackie xx
AKA Jackie_watts on DC
Thanks for sharing this simple and really fab idea :0)
Your creativity seems to know no bounds, Great work all the time. even with simple ideas such as this.
THANK YOU for sharing
What a lovely simple idea that really works...thanks for taking the time to show us how xx
Great tutorial hun - any tips on what lights to use or do you just photograph during the day ?
((hugs)) Suzie xoxo
I thought I had commented on this already!! Hmmmmm? Oh well, Im sure you'll have no objections to me calling you a Genius for the second time....even though the first time isnt here?? Eh? Oh I dont know either. This is fabulous. Im going straight into the Bat Cave and making one right now. Lee xx
Brilliant...thank you so much!!!
Sylvia xx
Will definately be trying this out, thankyou.
Just the sort of advice I reaaly need! Thank you so much for posting this. I also get muddled up about where to put the light source - would love tips on this. I make lovely things and take poor photo's!!
Thanks so much for this. Had asked the question on card-making-world and got sent here to your blogsite. As I've been told so many times before, KISS and this is another prime example.
Denise
Brilliant, so simple but effective, thank-you for sharing x
I think this idea is great, I use a proper light box with the two lights showing up the object and also various coloured backgrounds, works magic every time...... Ursula
I think this idea is great, I use a proper light box with the two lights showing up the object and also various coloured backgrounds, works magic every time...... Ursula
hey! i like your sense of humour Rottie! And your dog is GORGE, what a face! Gotta tell you Im loving your Xmas town card and the way you 3D'd it and put little pearls for strings of xmas lights!
Also thanks for tutorials, will make one of those white card 'things' to take pics of cards with a white background. Thank you for taking the time! Happy crafting and kisses to doggie!
Denise F
xxxx
Karen, you are a genius! The girls in the forum directed me to this tutorial when I was asking where you all take photos. I'm so glad you made it and that I found it! Thanks for sharing! xx
Brill idea :)
Thanks Karen - simply brilliant!!!
Kind regards
Dianne
Woohoo.... This is awesome!
Thanks so much. I was always pulling out giant watercolour or sketch pads to take pics on but sometimes it was hard to hide the sides! Now I have made one of these I can take pics at any angle with no fear of any extra stuff making it into my pics! So much easier for my DT pics :) Thanks ever so much1
Hi.
This was really a smart tip. Thank you for sharing.
Merethe :)
Comment n'y ai pas pensé .! Merci. les photos seront mainenant faciles à prendre.
Post a Comment